Click to images enlarge:
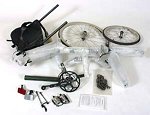 |
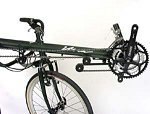
First step, unpack and unwrap everything in your bike's shipping box(es). We recommend laying out all the parts and your tools in a clean, well-lighted workspace to avoid losing items. It will make your job much easier if you clamp the main frame in a bike work stand.
|
 |
Your handlebar assembly should be hanging from the cables, and you will need to unwrap/unwind the cables so that the cable housings are smoothly routed and not twisted. You should NOT need to disconnect the rear shift/brake cables to attach the handlebars to the fork. Tighten the stem wedge bolt after leveling the handlebars with a 6mm allen. On OSS only, grease the stem wedge before inserting into the head tube (not shown).
|
 |
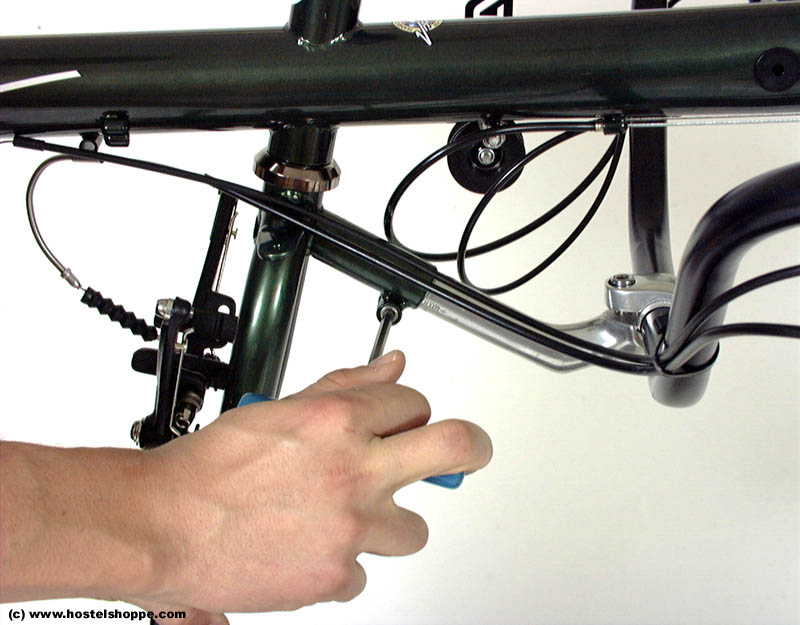
Tighten the side stem clamp bolt with a 5mm allen. Also, be sure to double check the handlebar angle adjustment and the tightness of the 6mm bolt that attaches the handlebars to the stem.
|
 |
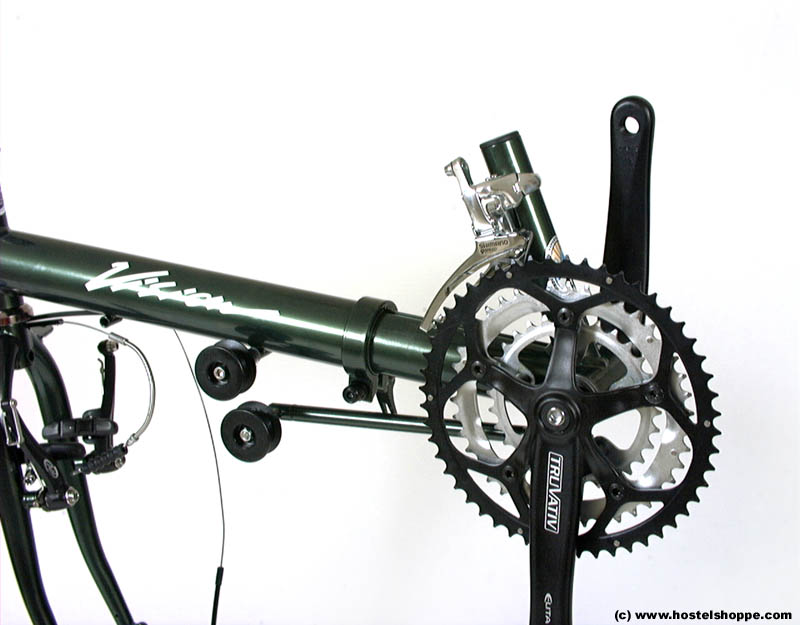
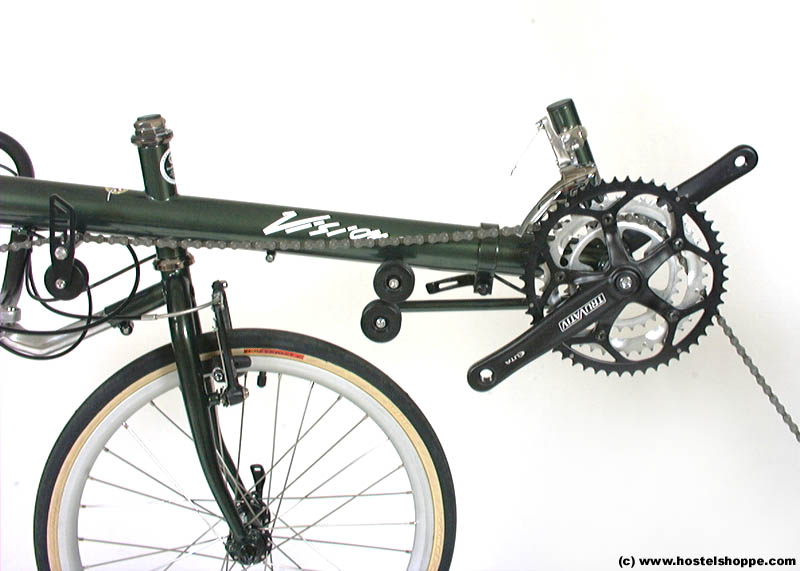
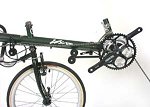
Loosen the boom quick release clamp on the main frame and insert the boom. The boom is keyed with an alignment channel that interfaces with the clamp on the main frame. In some instances, the boom may be marked with tape to indicate your approximate x-seam length.
|
 |
Once the boom is inserted to the approximate length, rotate the boom clockwise (sitting on the bike) until it is locked against the wall of the alignment channel. Tighten the boom quick release.
|
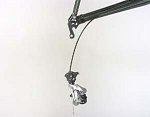 |
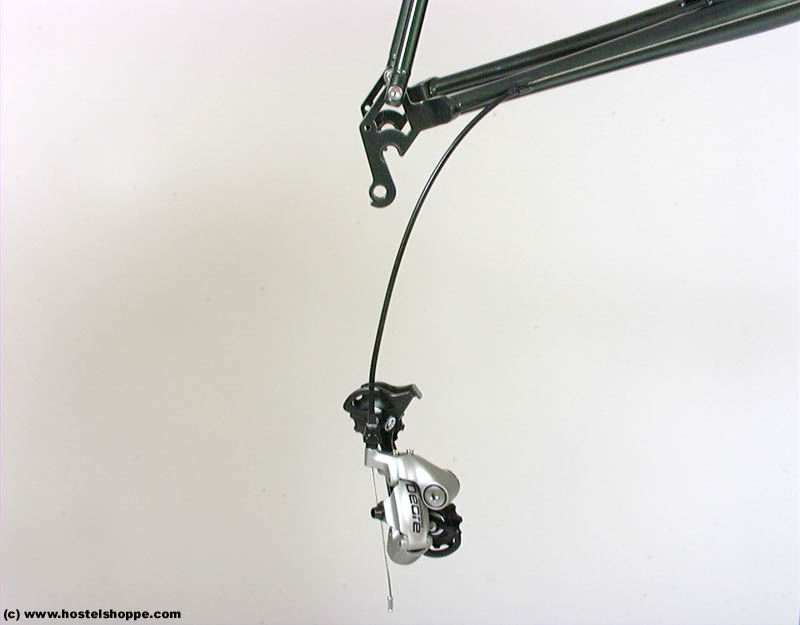
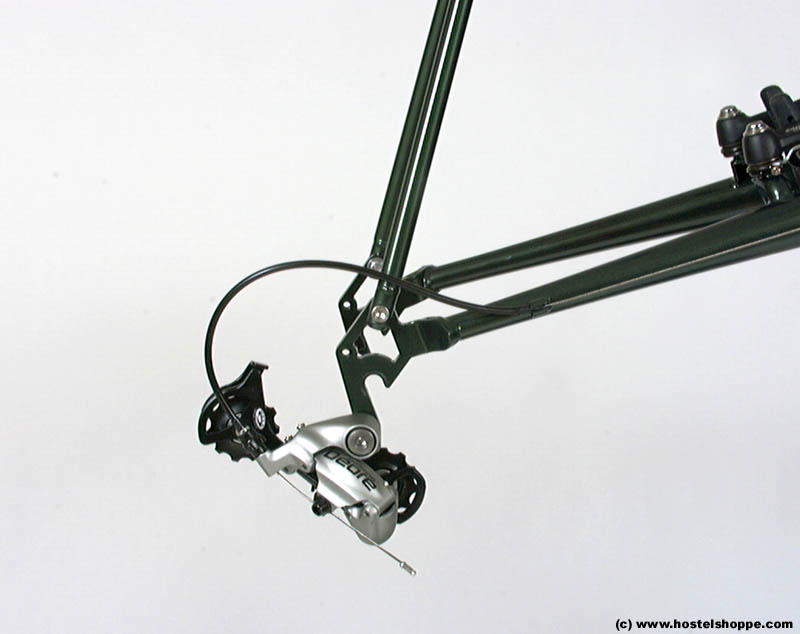
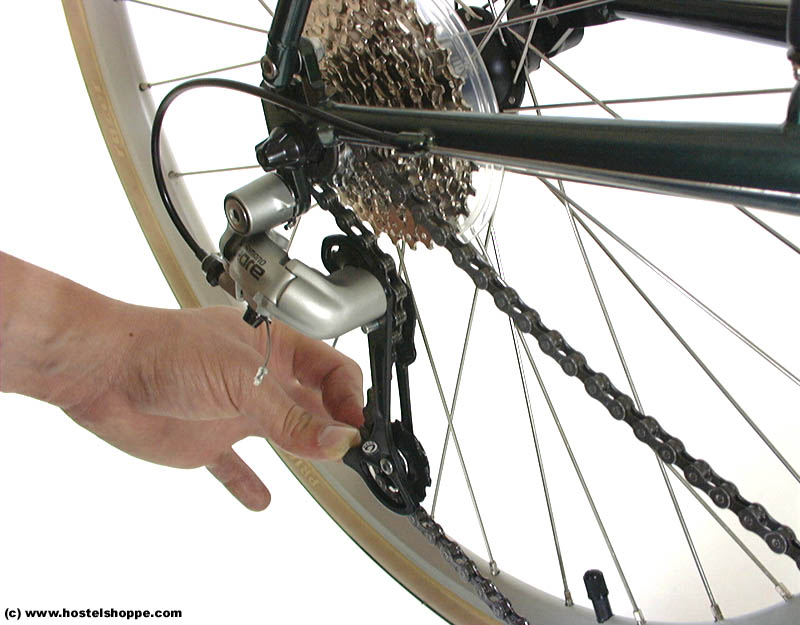
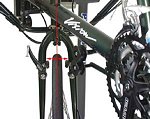
In most cases, we will remove the rear derailleur from the frame to help protect it and the dropout from impacts during shipping. After the packing material is removed, the rear derailleur should be hanging from the cable as shown in the picture. Do NOT disconnect the cable.
|
 |
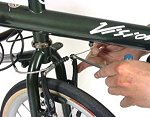
Rotate the derailleur back so that the mounting bolt lines up with the dropout hole. Use a 5mm allen wrench to attach the derailleur to the frame. Be careful to not cross-thread the bolt into the frame.
|
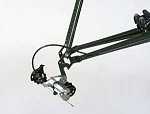 |
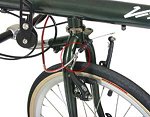
When re-attached, your rear derailleur should look like this. The derailleur cable has been adjusted and tested prior to shipping, so there should not be any major adjustments required after the rear wheel and chain are installed.
|
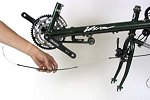 |
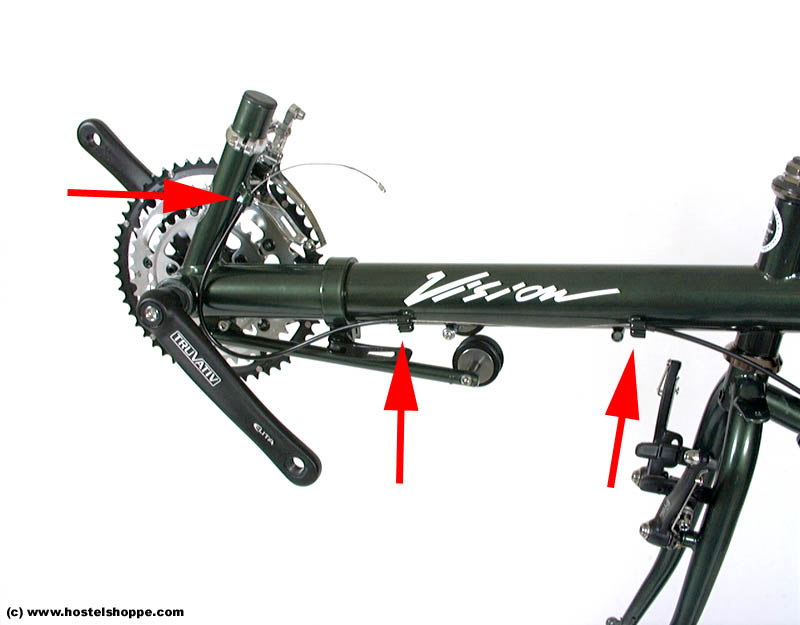
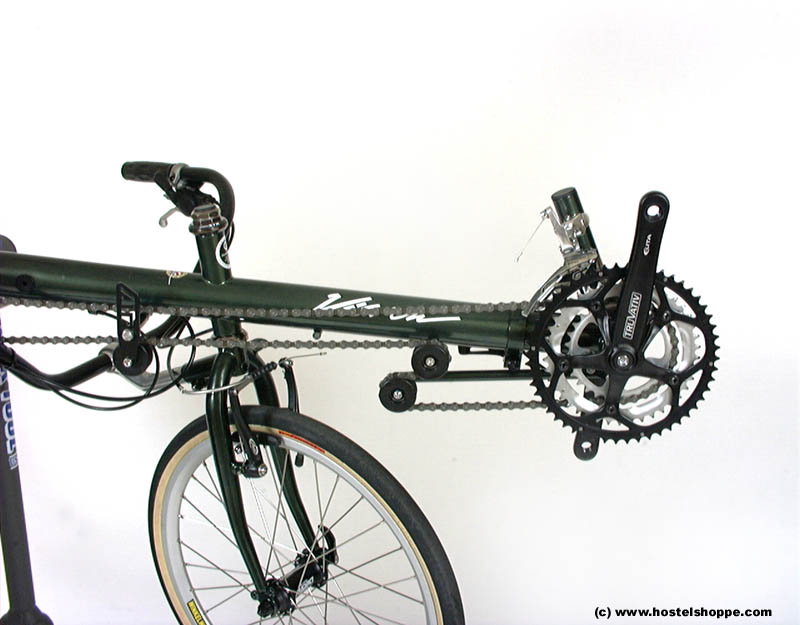
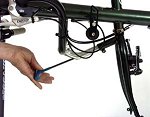
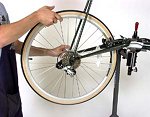
Moving to the front of the bike, route the front derailleur cable from the shifter to the front of the bike as shown. Be sure the cable has not been kinked in shipping. If it has, carefully straighten it with your fingers or a pliers.
|
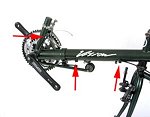 |
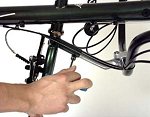
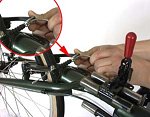
Insert the cable housing sections into the frame stops as shown.
|
 |
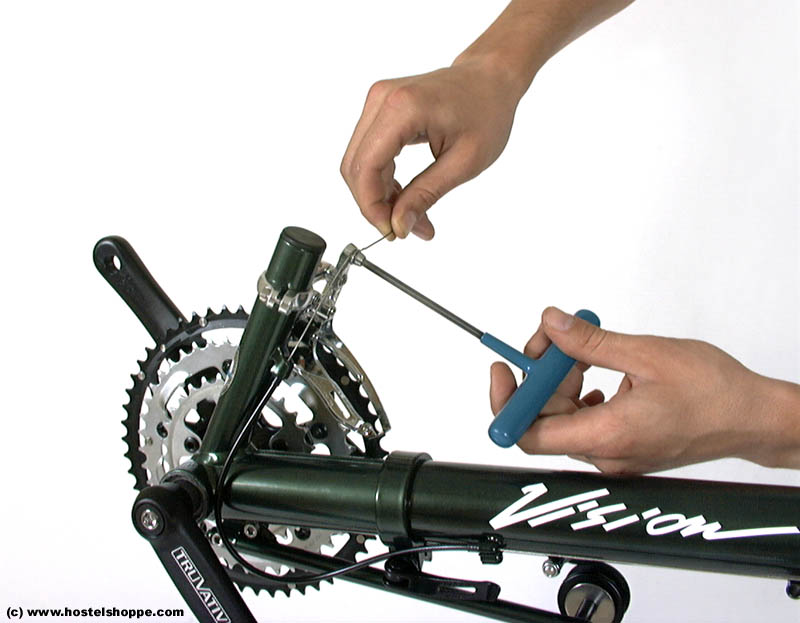
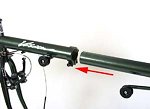
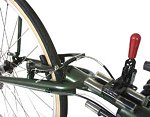
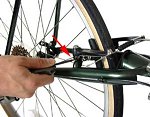
Pull the end of the cable with your fingers and attach it to the front derailleur as shown. The front derailleur has been adjusted prior to shipping, so pulling the cable tight with your fingers should be enough tension for proper shifting. Be sure to review our Front Derailleur Cable Routing help guide page.
|
 |
Insert the quick release skewer into the rear wheel and the rear wheel
into the frame. Be sure the axle is set fully into the frame and tighten
the skewer securely.
|
 |
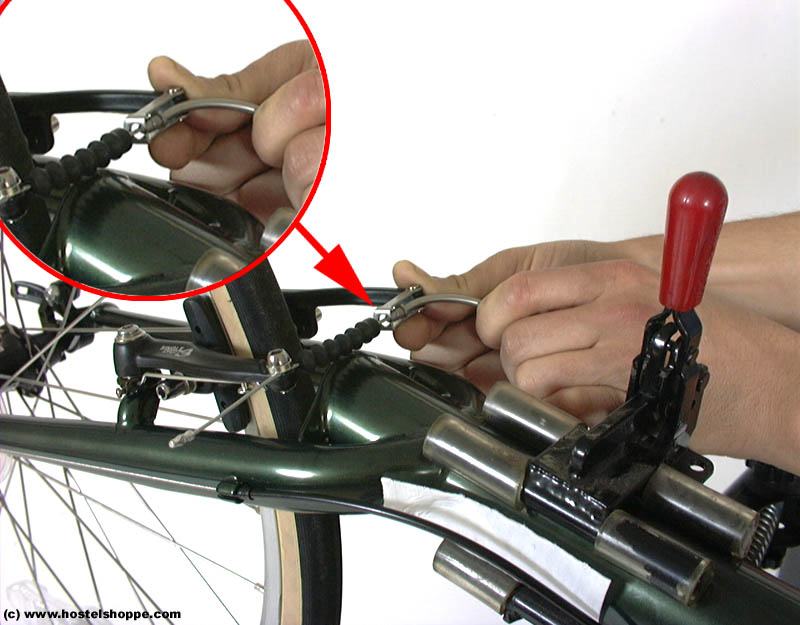
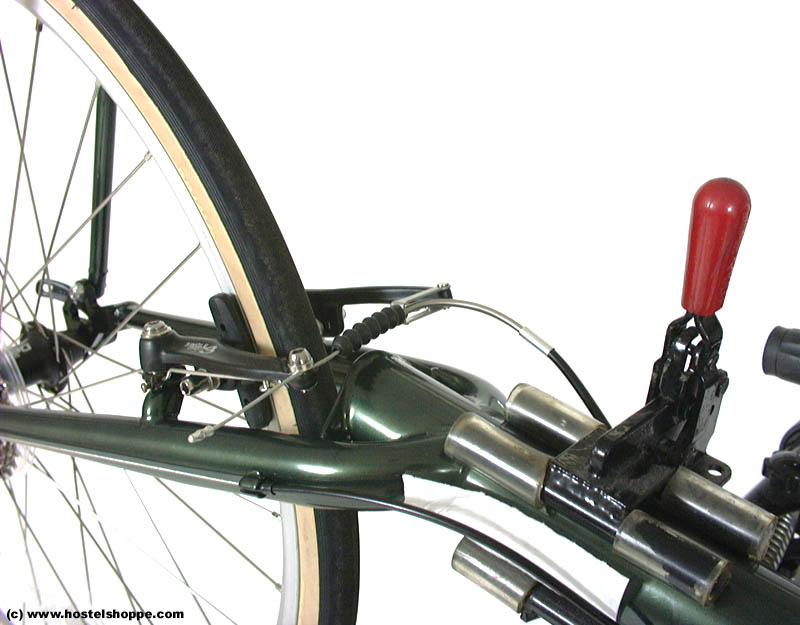
The rear brakes have been adjusted and tested prior to shipping. Simply
insert the brake noodle into it's holder and test the brakes. If the
brake does not appear to be adjusted properly, double-check to be sure
the wheel is centered in the frame properly before making any
adjustments!
|
 |
Squeeze the brake lever firmly several times and spin the wheel to be
sure the brake does not touch the tire at any point.
|
 |
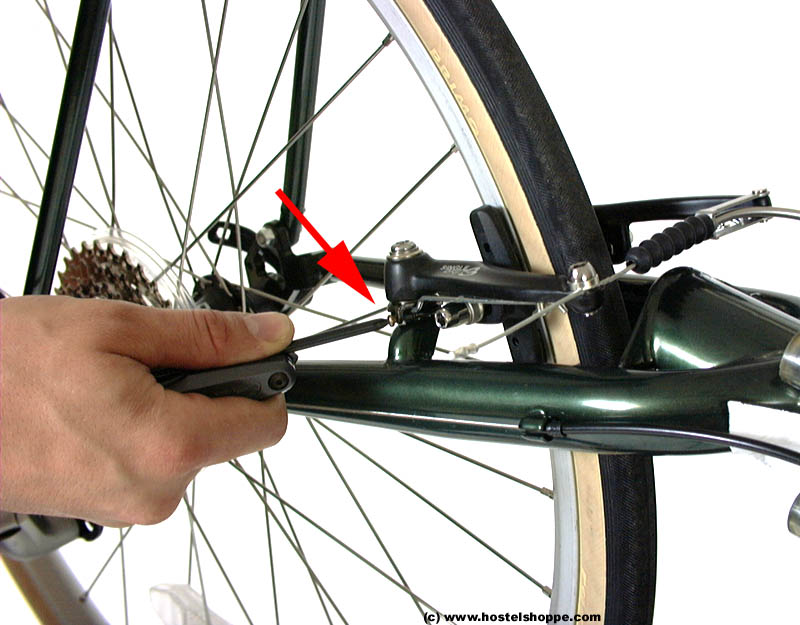
If the pads need to be centered, tighten the small adjustment screw on
the brake arm that is too close to the rim. Again, before making
any adjustments, be sure the rear wheel is in the frame properly.
|
 |
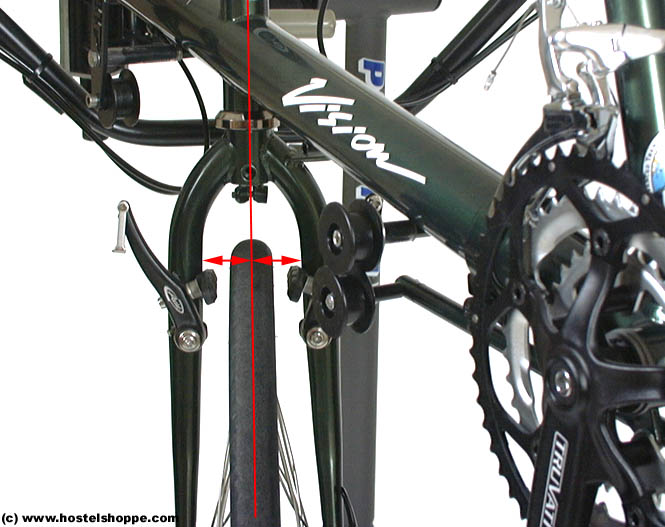
Insert the quick release skewer into the front axle and insert the
wheel into the fork. Be sure the wheel is centered in the fork as shown.
|
 |
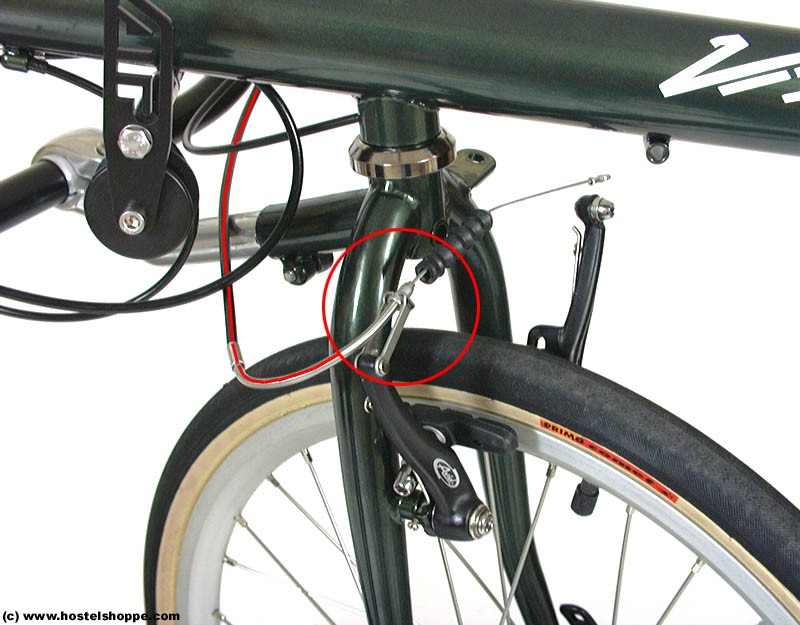
Route the brake cable over the stem and around the backside of
the fork as shown. Insert the brake noodle into the holder.
Note: OSS bikes are routed the same.
|
 |
Pull the brake cable and push the brake arms together until there is
approximately 2-3mm of space between each brake pad and the rim. Tighten
the cable pinch bolt with a 5mm allen wrench as shown. Squeeze the brake
lever several times and check for pad alignment. Once again,
before making any adjustments, double check the wheel alignment in
the fork.
|
 |
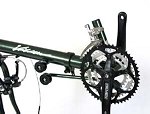
Unwrap the chain and route it over the rear guide, through the front
derailleur cage, and over the small chainring as shown.
|
 |
Bring the chain around the small chainring and back through the forward
idlers as shown. Be sure to follow the pattern in the picture, or the
automatic size adjustment will not work. Route the return chain through
the rear idler wheel towards the rear derailleur.
|
 |
Bring the upper chain over the smallest rear cog and through the rear
derailleur as shown. Be sure to route the chain through the derailleur
cage and guide tabs as illustrated in the picture.
|
 |
Thanks to the new Vision chain adjustment system, you should not need
to shorten or lengthen the chain, only re-join the links with a chain
tool. After the chain is installed, check your front and rear derailleur
adjustment to ensure smooth shifting and install your seat.
(See the Vision Owner's Manual for seat installation instructions or
refer to our Vision Seat
Assembly help guide.)
|